
One of the most helpful tools in a quilter's studio is the Design Wall.
With a design wall, you no longer need to clear large amounts of floor space to lay out your quilt blocks, hoping your family or pets don't step on them. Instead, your quilt blocks gets the special treatment they deserve!
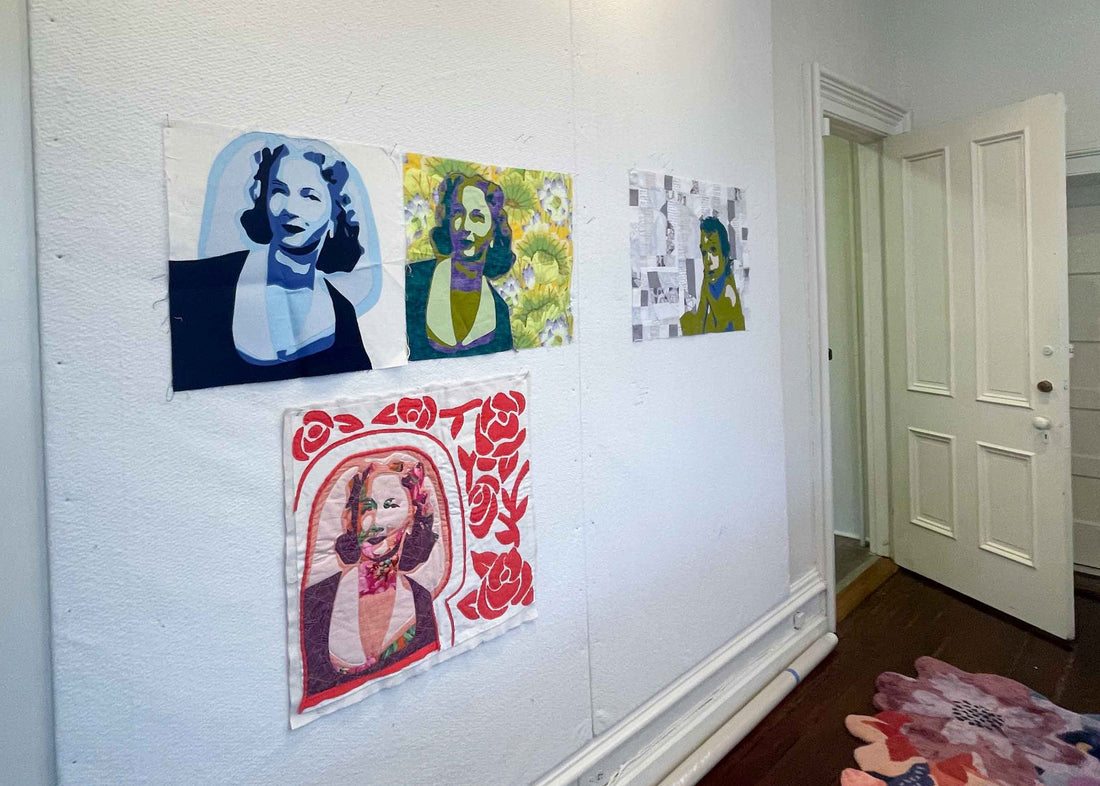
I love having a design wall to help me determine layout, to make sure everything is right where I want it before I sew everything together. It's so helpful to be able to step back and evaluate placement at eye level.
But how do you make a design wall?
It is so quick and simple! Let me take you inside my studio and share how easily I made mine.
A great design wall makes such a difference!
All you'll need is:
- Foam Insulation board from your local hardware or big box store
- Batting or Flannel, enough to wrap your board
- Duct tape
- Nails to hang your board (optional)
Soon you'll be able to step back and admire your quilts!

I'd love to hear from you! Do you have a Design Wall? What do you love about it?
P.S. If you're eyeing the quilts on my design wall and wondering how to make them, you can get access to my Portrait Quilting workshop inside Meander. Learn how here.
12 comments
What kind of batting did you use?
I have a similar setup in my basement sewing room, though with (much!) lower ceiling height than yours. We hung the foam core horizontally, so it’s only 4 feet tall. I’m thinking we need to add to this to get the rest of the way to the floor. I also have the two free-standing panels I used in a former sewing space, and stand them against the stash shelves just outside the sewing room. Lots of space for lots of projects!